10 — Ultimate Make-Up Products You’ll Ever Need!
10 — Ultimate Make-Up Products You’ll Ever Need! contrary to what beauty gurus are telling you.
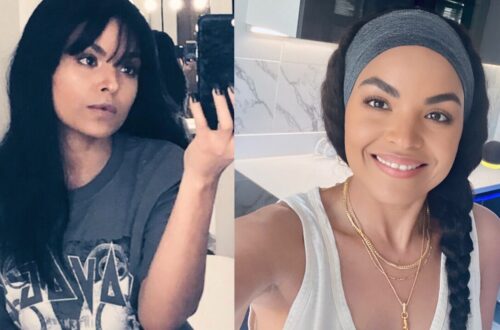
I have enjoyed working with many make-up artists throughout my modeling career. During this time I have had all sorts of make-up done for work, some were out of this world beautiful and some were pure insanity, to say the least!
Believe me when I say, I’ve got the scoop on the ultimate makeup kit every modern beauty lover needs—one that’ll have you looking flawless and still leave some coins in your bank account, where they belong!
So, grab a drink, a notepad, and let’s get started!
Skin Preparation:
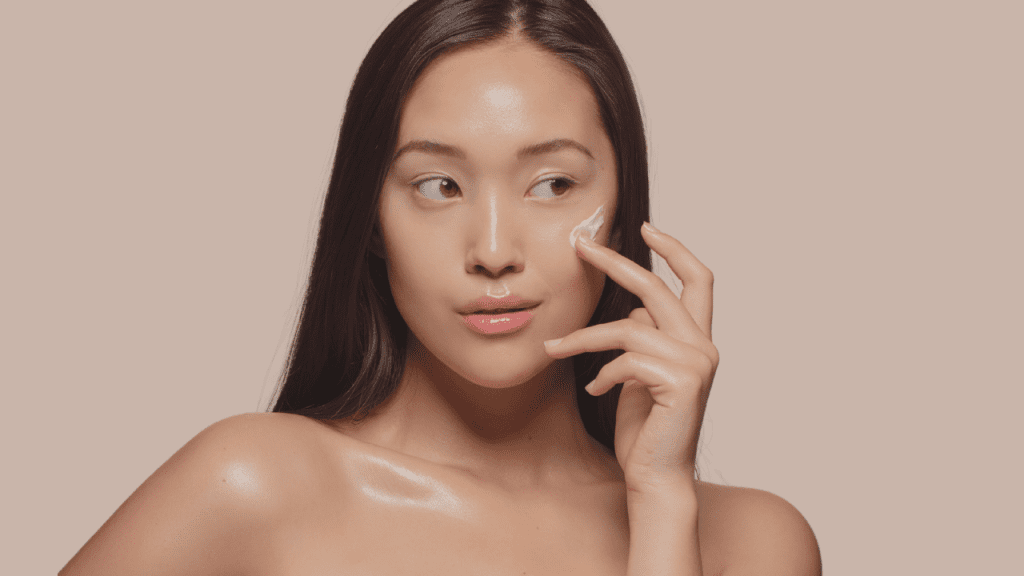
What is skin preparation and what are the benefits of it?
Whether you have oily skin, dry skin, or sensitive skin, get to know your skin as you would your best friend. Because it is the best bestie you’ll ever have. Finally, whether it is in the middle of summer or in the depth of winter, sunscreen with SPF 50+, is a must! Believe me on this.
Skin preparation is a crucial part of flawless natural-looking make-up. Do this by making sure that you cleanse your skin with appropriate cleansers according to your skin needs, followed by a good moisturizer and SPF50+ sunscreen. Exfoliating the skin on a weekly basis is a must for smoother complexion. The benefit is a clearer complexion and therefore a flawless finish make-up.
Why should I believe you? You say,
Well check me out, down below and I am 47 going 48 with no wrinkles in sight!

1: Primer : How to Prep Your Skin Like a Pro Before Make-Up
Primer, in the context of makeup, is a product used as a base before applying other make-up products like foundation, eyeshadow, or concealer. Its primary purpose is to create a smooth and even surface on your skin, allowing makeup to adhere better and last longer.
Okay so our skin is on point, and our face is baby butt soft then what?
We start with a very important step which is priming the skin for the makeup to adhere to. This product is called, you guessed it, Primer.
There are many variations of Primers as you would find in your skincare, Some Primers can be used in the summer months to minimize the melting of the makeup and some can be used in the winter months to minimize the drier air.

My favorite way to use it is by priming my T-zone with an oily-free, pore-minimizer primer and then using a moisturizer primer on the rest of my face. Let This dry before starting with your next step.
2: Foundation : Tips That Actually Work for Every Skin Tone
A foundation is a makeup product used to create an even and uniform complexion. We typically apply foundation to the face in order to cover imperfections and even out our skin tone, therefore providing us a smooth base for other make-up products to go on to.
When it comes to the foundation you will need a few tries and errors to find your ideal shade, to this day I am still doing this. What I now do is buy two foundations one slightly darker than my skin tone and one slightly lighter than my skin tone, I then mix a small amount together until I find the correct shade that I like.
This not only provides you with your ideal shade, but it also means you will not need to buy two shades, one for the Summer month and one for the Winter month. Thank me later!
Foundation Application:
After your Primer has dried, this usually takes 1–2 minutes, then put your ideal foundation shade on the back of your hand, mix this together one last time, then dote it all over your face.
Get your beauty sponge, I personally prefer the Real technique Sponge, they are cheap and better than any of the expensive alternatives.
Run the sponge under a running tap until soaking wet, towel dry, and then use a kitchen towel to dry it more. Remember, we need our sponge to be damp and never soaking wet.
Start with a patting motion, as seen in the video below.
Add more or as little as you need coverage-wise, but please note, that you really need one to two layers of light foundation and nothing more, We still have a concealer that we will use to highlight and cover up unwanted dark spots and pimples.
Once we are happy with the look of the foundation, we then go for our next step.
3: Concealer : Hacks to Brighten & Lift Your Look Instantly
Concealer is used together with foundation, it is an important part of the makeup.
Concealer is usually thicker than foundation and can be used to brighten and cover dark spots and under-eye circles.
Concealer, in my opinion, is where the fun starts, You can use two concealers, a one-shade lighter on the entire under eye and then a small amount of a concealer that is two-shade lighter than your foundation to the inner corner of the eye to brighten it the under eye area.
Remember to use the above step only if you are going out at night. This usually shows that you have too much makeup when done during the day. The idea here is to look youthful and flawless.
We want people to comment on our flawless face and not nice make-up.
With the above in mind, I would recommend using only one concealer that is one shade lighter than the foundation during the day.
4: How to Use Setting Powder Without Looking Cakey
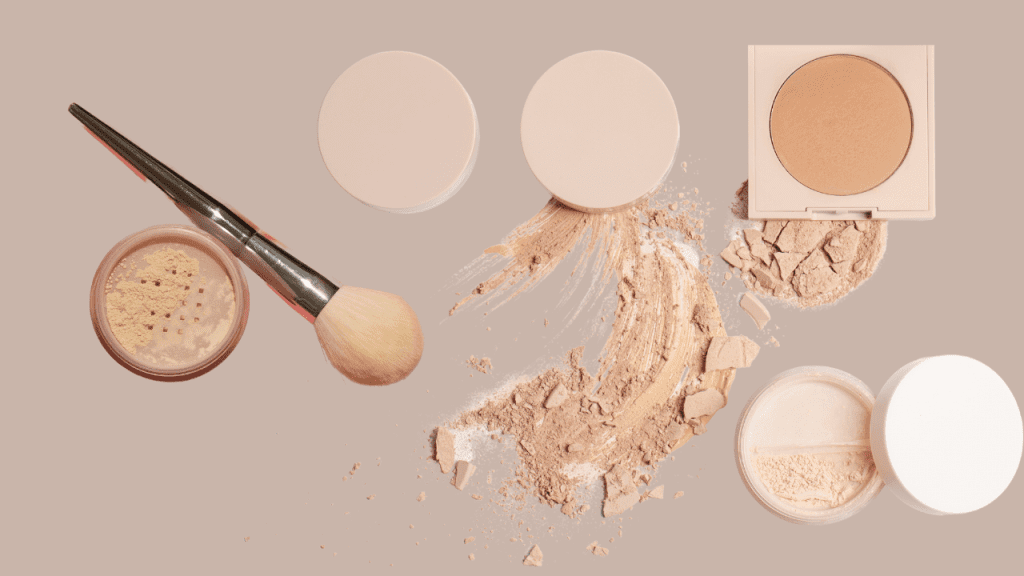
Setting powder is a crucial step in makeup application. It is a finely milled, loose, or pressed powder that is applied after foundation and concealer to set your makeup, this in turn will help the liquid products used to last longer. Setting powder also helps reduce shine especially if you have oily skin.
After the concealer application, wait for about 5 seconds or so and go back to any place that you can see creasing or separating, Fix this by using your beauty sponge before using the setting powder.
Here I prefer to use the same beauty sponge on the clean side. Take a small amount of setting powder and start by setting it under the eye, then over the eye (the lid), the nose, and then the rest of the face. Add extra powder (baking) to the places that crease easily like the side of your mouth the corner of your lips, the chin, and so on. Anywhere that is likely to crease or separate during the day.
Leave the setting powder there until you are done with the makeup.
5: Why Every Woman Needs a Bronzer (Even for Natural Looks)
We use Bronzer products to add warmth and dimension to the face by mimicking a sun-kissed glow and natural shadows of the face.
After using the foundation and the concealer, you are then left with a very clean yet flat face. Our face naturally has different shades and shadows, by using Bronzer, we’re bringing back the shades and shadows.
How to use a Bronzer?
With a large brush as seen in the video linked above. Take a small amount at a time and gently brush upward or pat the bronzer on the cheekbones in an upward motion followed by the side of your face toward your temple and what is left swipe it on your jawline.
Using a crease brush, contour your eyelids and the side of your nose to shape the nose as you want. With a flat brush, gently add the bronzer underneath your eyes and smudge it slightly to create that definition without the harsh lines.
This application will give you a flawless finish because you will look as if this is your skin and not that you have makeup on. Simply because there are no colors or harsh lines in sight. Those are the main reasons that Blushes and contour kits are a waste of your money in my opinion.
To finish slightly dast your setting powder under the cheekbone just after the contour, this will add that definition and make you look as if you have had some work done on your face, You are welcome!
6: The Perfect Eyebrow Pencil Technique for a Soft, Defined Look
An eyebrow pencil is designed to enhance the appearance of eyebrows. It typically comes in the form of a pencil with a waxy or creamy texture and is available in various shades to match different hair colors. Here’s how to use an eyebrow pencil:
They say the eyes are the window to your soul, so think of the eyebrow pencil as a road sign, showing people the direction in which they can find the window to your soul.
The key is to choose the eyebrow pencil to match the color of your hair, however, I personally find as I age, I look good with lighter brows, so my hair color is black but my eyebrow pencil color is dark brown.
Experiment here to see what looks good on you, the trick is to choose a color that makes your eyebrow not stand out more than your face.
Eyebrow pencil helps you define the eyebrows and finish off the flawless look. Just make sure to not go overboard with this, we want to look flawless and not cartoony.
Slightly go over your already brushed and shaped brows, to make sure the shape of them comes close to being sisters, as one can never get eyebrows to look the same for some reason, and so the saying, “eyebrows are not twins, they are sisters” to came to life.
Use the flicker motion as if you are painting an individual hair, this by far makes the eyebrows look natural and therefore flawless. Do not worry if you make mistakes, this is when your concealer comes back into play.
Tap the concealer on the back of your hand together with a small foundation, mix this together, and use your concealer brush to clean and create the brows shape you want.
After that use the setting powder to set the concealer and brighten under the brow.
7: How to Achieve Fuller Lips with Just Lip Liner

When it comes to the lips, my tried and true way to look natural and flawless is bypassing the lipstick altogether and instead going for two lipliners, one slightly darker nude than the other. Start by moisturizing the lips properly to avoid dry lips, then start lining the outline of the lip, starting from the bottom of the lip upward then with the bottom lip, start from the outside of the lip and work your way to the middle, and then just join the two line together.
This technique will make sure your lips are nice and big as opposed to a narrower look. Finally, run the lipliner to the whole lip and top up the middle part with the lighter shade. This will give your lips dimension and make your lips look natural and fuller.
The last step on the lip is taking a small brush with your setting powder and patting the powder on the full lips. Then take a tissue and wipe the inside of the lips where the lipliner ended to avoid that nasty look when you have a drink or dry lips. And there you have it ladies, a perfect lips that will look that way all day.
Note: If you have dry lips, dab Vaseline inside of the lips where you wiped off the lip liner. This will give you comfort without the need to add gloss to the entire lips.
8: Master the Art of Natural Lashes with Mascara & Curlers
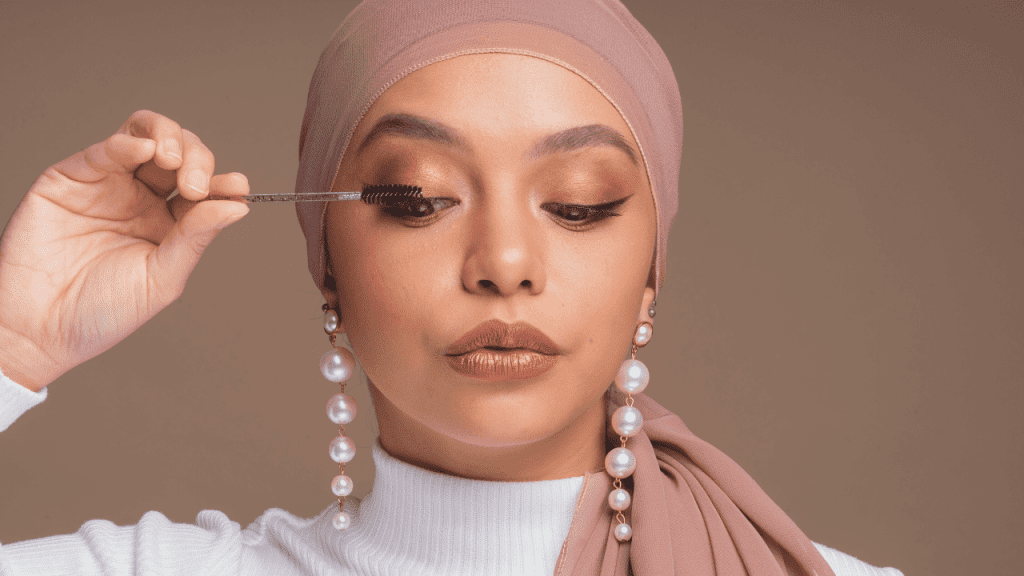
Mascara is a cosmetic product used to enhance and define eyelashes. It typically comes in a tube with a wand applicator. Here’s how to use it effectively:
Since our natural eyelashes are black or should be black. I would recommend sticking to jet-black mascara. But before we add mascara to our eyelashes we need to use eyelash curler.
Do not skip on your lash curler as it makes a huge difference to how beautiful your natural lashers will look after the mascara. An eyelash curler will also turn the lashes upwards and this will help you from getting those annoying lashes poking your eyes during the day.
Apply two coats of mascara. For the first coat make sure the brush has very little product, start from the bottom of the lashes, and move your way up in an upward motion. Take your time here, we don’t want mascara all over our hard work.
For the second coat again, take very little product, and this time apply only the top of the lashes as we do not need to add any more product to the area we have previously worked on.
So the second coat should go like this, slightly close your eyes just until you can see the top half of your lashes and concentrate on the top half until you start seeing them lengthening. Usually, this will happen after three to four strokes, stop there.
The last bit is again close the eye as you did before and only coat the outer corner of the lashes, this will create the slight wing effect and make your lashes look longer and sexier cat-eye-like.
When it comes to lower lashes, usually go for the same mascara and only slightly give one coat to them. However, you can try to go for a different colour, like brown which will give you that beautiful natural look.
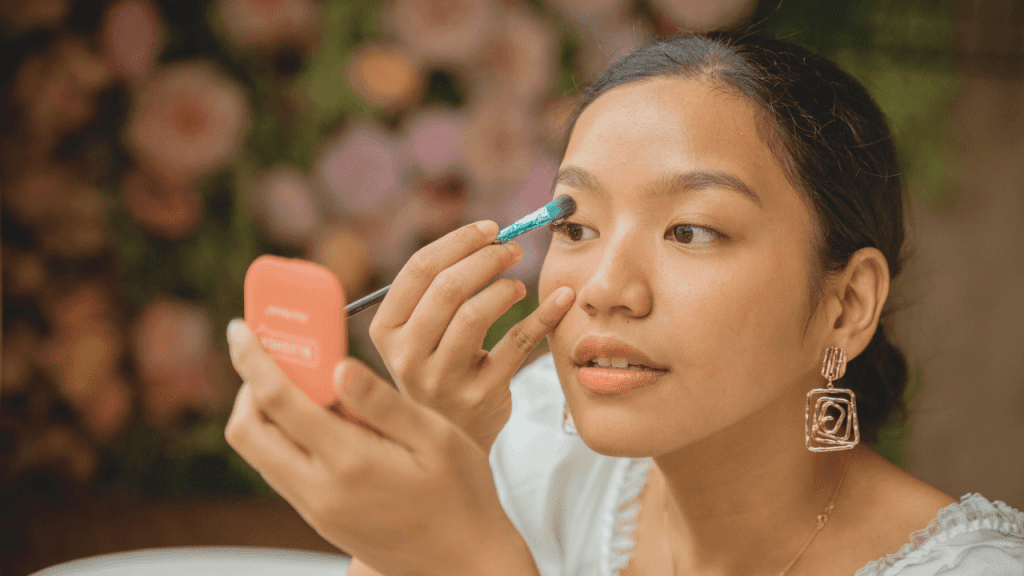
9: Highlight Like a Pro: Where, When & How
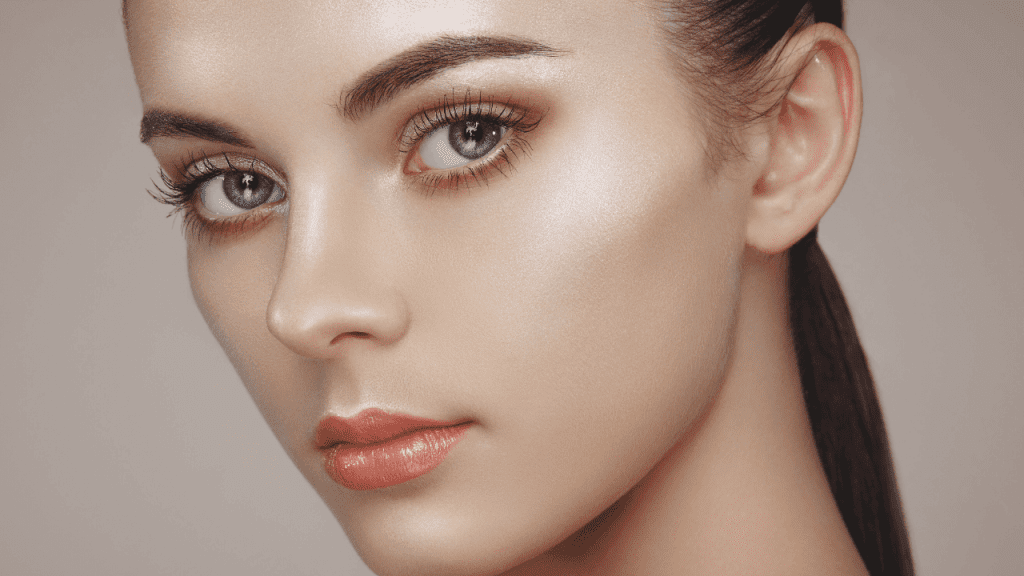
Highlighter is a makeup product that reflects light. It is used on the highest points of the face to brighten forth those points.
When choosing a highlighter make sure to go with something close to your skin tone, this will make you look like you are glowing from within as opposed to a shiny ball.
I usually go for dark gold, dark rose gold looks really good, or bronze gold. I never go for lighter-yellow gold or champaign colour highlighter just to give you an example.
Many stores have samples you can try before you buy, it is definitely worth the trip.
Where Should you apply highlight?
The highlight points are the cheekbones just above your bronzer, the inner corner of the eyes, the bridge of the nose, the cupid’s bow or above the lip, and the side of your eyes. What is left on the brush swipe under the eyes, over the eyes and the eyebrow bone, as well as the chin.
Now use the same brush to wipe off any access setting powder left on the face before our next step.
10: Lock It All In: Why Setting Spray is a Must-Have
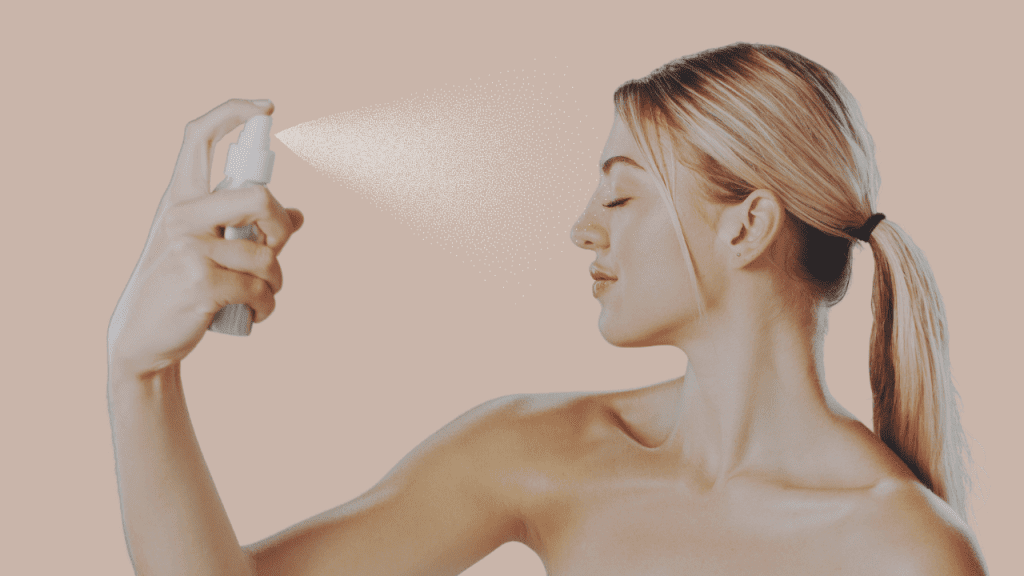
Setting spray is essentially a liquid mist, often containing water and alcohol as main ingredients, that is applied after you’ve finished your makeup to set it in place. Setting sprays has the following benefits when used correctly:
- It helps make-up last longer
- It will mattify or make your make-up dewy
- Setting spray prevents Smudging and Transferring of the make-up
- With the right setting spray, you can easily add hydration to the face and make it less cakey-looking and drying.
- The right setting spray can help control temperature during the summer months.
Setting sprays are a go-to when it comes to natural-looking make-up. They melt the product into your skin and make the make-up look as if you are just glowing from within.
So after you have followed the above steps, spray the face with a mattifying spray if you have oily skin or hydrating spray if you have dry skin.
What I do with my combination skin is I have two setting sprays, a mattifying one and a hydrating one. I will start by using my mattifying spray and let it set for about 1–2 minutes or so, give it a second coat, and wait for it to dry once more. I then do these steps with a hydrating spray.
And a voila!
You have yourself a beautiful skin, oh sorry!
And you have yourself a natural flawless makeup that people will think you just happen to have beautiful skin. And of course, you will have beautiful skin too if you follow these steps.
Conclusion
Just a recap, to have flawless natural-looking make-up it is very important that we start looking after our own skin by cleansing it, moisturizing it, and exfoliating it to get rid of any dead skin.
Once we have a smooth base, Prime your face before using your makeup products, This will make sure the makeup adheres to the skin as well as protect the products from sipping through your skin and this could easily cause irritation and breakouts to the skin.
Once you have applied your primer and let it set for a minute or two, go in with two light coats of foundation. Then add your concealer followed by your favorite setting powder, bronzer, eyebrows, lips, eyelashes, and highlighter, and finish off with your choice of setting spray to lock in your work of art to enjoy for hours to come.
Remember, we can only achieve the above if we start with self-love, with self-love comes self-care, only then will we feel worthy of taking time for ourselves.
So girl take this as your sign from the Universe to start and prioritize you!
Want to know which brushes actually matter? Don’t miss my upcoming post where I share the only brush set you need to slay every look, 8 — Ultimate Make-Up Brushes You’ll Ever Need!
FAQs
Can I use this product to get the glam look?
Yes, you can, by adding a little more bronzer on the eye using the eye pencil to add a wing liner, and smudging it to make it a smokey eye. take the highlighter and add this on the entire lid for that va-va-voom night-out look.
What products can I add for a sensual look?
by adding a little more bronzer on the eye using the eye pencil to add a wing liner, and smudging it to make it a smokey eye.
Do You Put Highlight Before or After Makeup?
Highlighter can be done either way, you can add highlight liquid on the areas first and then do your makeup as normal followed by a powder highlighter or after your foundation, concealer, and a setting powder.
What is the list of makeup Kit for beginners on a budget?
The affiliate link we have added to this article will give you some budget-friendly make Kit for beginners. We believe in looking flawless without breaking the bank.
What makeup do I need for an everyday look?
This article will give you just that, an everyday natural make look.
What does a basic makeup kit have?
The basic makeup kit should include, a primer, foundation, concealer, setting powder, mascara, eyebrow pencil, eyelash curler, bronzer, highlighter, setting spray, and nude lipliners. You can use this kit for all sorts of looks, natural, glam, or smokey eye sultry look.
MF
Hi, I’m Maeva Farida Smith, the founder of Womanlyblog - the Ultimate Women’s Bible to Youth. At 47 years young, I’ve learned that beauty, health, and confidence aren’t just about genetics—they’re about knowledge, habits, and mindset. I created this blog to connect with like-minded women worldwide, sharing timeless wisdom on staying youthful, feeling confident, and living your best life—inside and out. From skincare secrets to fitness that fits your lifestyle, from personal style to deep, meaningful relationships, this space is about empowerment, self-care, and sisterhood.